Cloudflare Logpush
Cloudflare Logpush sends HTTP request logs to Ahrefs automatically. It is the recommended method for high-traffic sites, but requires a Cloudflare Enterprise plan.
Prerequisites
- A Cloudflare Enterprise plan on the zone you want to monitor.
- A Cloudflare API token with the following permissions:
- Zone → Zone → Read
- Zone → Logs → Edit
- For the manual setup only:
jqinstalled locally, which the setup commands use to read and update your Cloudflare configuration.
Obtaining Cloudflare API token
Make sure you are logged in to the Cloudflare Dashboard with the correct account. Then navigate to the https://dash.cloudflare.com/profile/api-tokens page, locate and click the Create Token button in the top right:

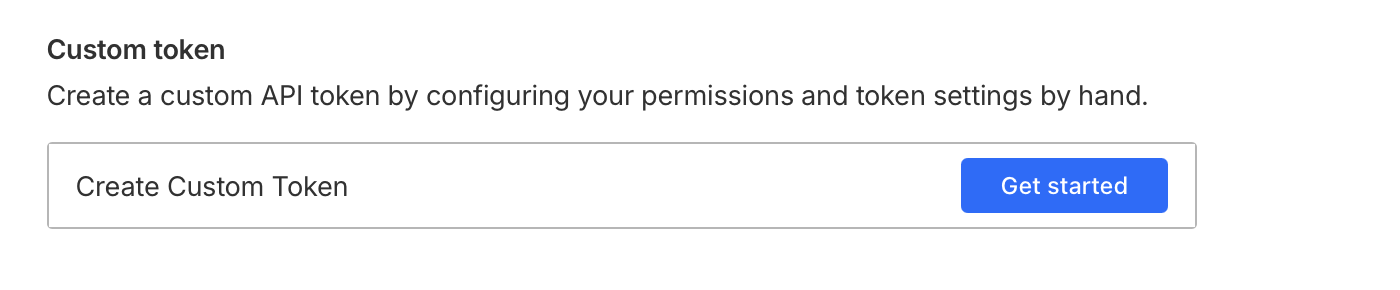
Now proceed with the Create Custom Token flow:
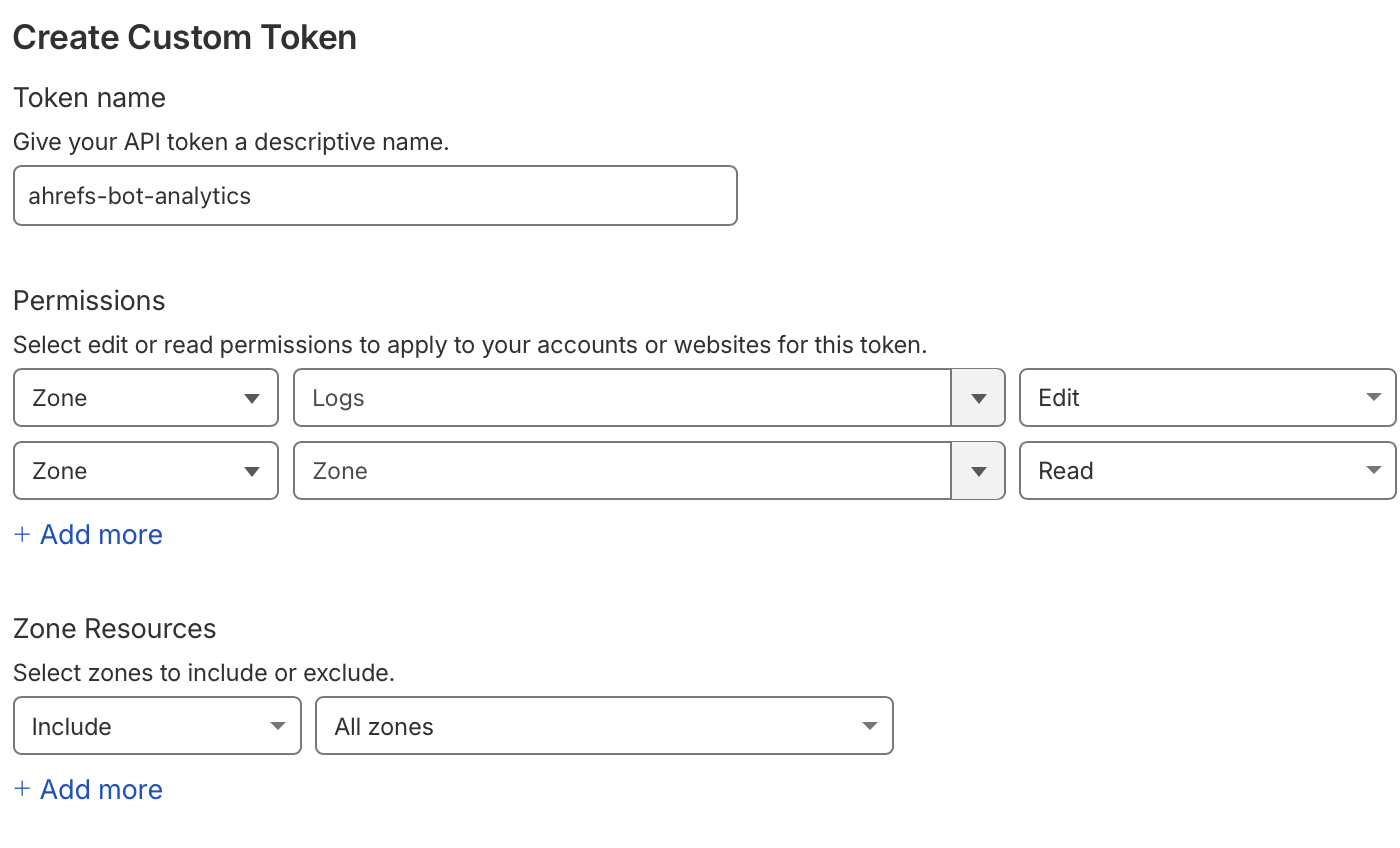
Fill in the following information:
- API token name: ahrefs-bot-analytics
- Grant the following permissions:
- Zone / Logs / Edit so we can configure a Logpush job to push logs to Ahrefs Bot Analytics
- Zone / Zone / Read so we can locate the zone to configure
- Zone Resources can be set to Include / All Zones, alternatively select the Zone which corresponds to your website's domain.
Now click the Continue to summary button, the summary should look like this:
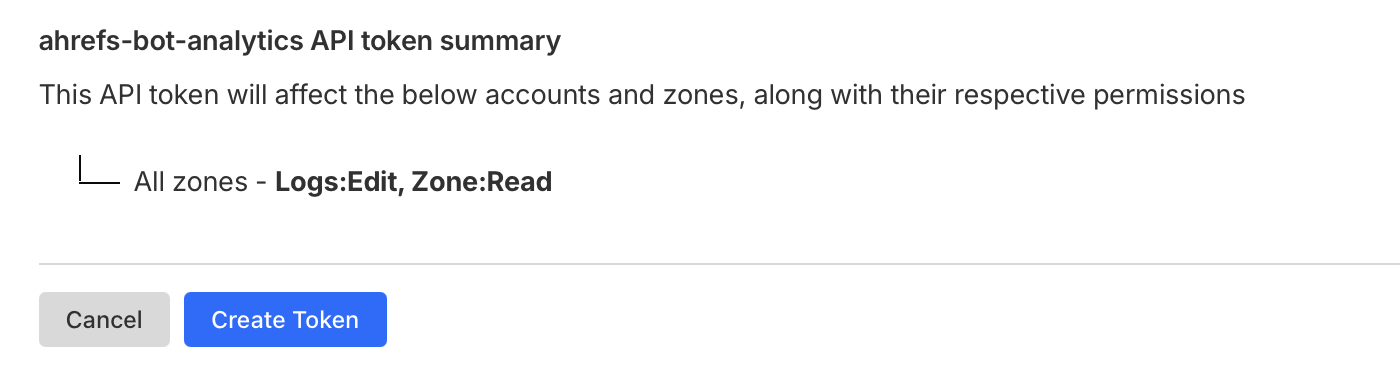
Now click the Create Token button and copy the generated token to the clipboard to use in the next steps.
See the Cloudflare documentation on how to create an API token for additional information.
Automatic setup
- In Ahrefs, go to Project Settings → Bot Analytics.
- Select Cloudflare Logpush as the method.
- Paste your Cloudflare API token and click Connect.
Ahrefs will use your token to:
- Find the zone matching your project's domain.
- Check for existing Logpush jobs.
- Create a new job that sends logs to Ahrefs.
- Add a custom log field rule to the zone, so that bot verification headers (
signature,signature-inputandsignature-agent) are included in the logs. Existing rules on your zone are preserved.
info
Your token is used once and not stored.
Manual setup
If you prefer not to provide an API token, you can set up the Logpush job manually using the Cloudflare API.
Step 1 — Get your API token
-
Go to your Cloudflare dashboard and select your website's domain.
-
Click "Get your API token" and create a new token with the following permissions:
- Zone → Zone → Read
- Zone → Logs → Edit
See Obtaining API token for detailed instructions.
info
You do not need to look up your Zone ID. The commands find the zone from your domain using the Zone → Zone → Read permission.
Step 2 — Create the Logpush job
Fill your API token into the first block, then run each block below one at a time in your terminal, checking that each one completes without an error. Together they find your zone, create the Logpush job, and add the custom log field rule described in Automatic setup. You can find the exact commands pre-filled with your project's details in Project Settings → Bot Analytics → Set up manually.
export CF_TOKEN="<your Cloudflare API token>"
BASE="https://api.cloudflare.com/client/v4"
Find the Cloudflare zone for yourwebsite.com
ZONE_ID=$(curl -s --fail-with-body "$BASE/zones?name=yourwebsite.com&status=active&match=all" \
  -H "Authorization: Bearer $CF_TOKEN" | jq -r '.result[0].id // error("no active Cloudflare zone found for yourwebsite.com")')

echo "ZONE_ID=$ZONE_ID"
Remove the existing Logpush job if present
OLD_JOB_ID=$(curl -s --fail-with-body "$BASE/zones/$ZONE_ID/logpush/jobs" \
  -H "Authorization: Bearer $CF_TOKEN" | jq -r '([(.result // [])[] | select(.name == "ahrefs-web-analytics-http-requests")])[0].id // ""')

echo "OLD_JOB_ID=$OLD_JOB_ID"
if [ -n "$OLD_JOB_ID" ]; then
  curl -s --fail-with-body "$BASE/zones/$ZONE_ID/logpush/jobs/$OLD_JOB_ID" -X DELETE \
    -H "Authorization: Bearer $CF_TOKEN"
fi
Create the Logpush job
curl -s --fail-with-body "$BASE/zones/$ZONE_ID/logpush/jobs" -X POST \
  -H "Authorization: Bearer $CF_TOKEN" \
  -H "Content-Type: application/json" \
  --data-binary '{"name":"ahrefs-web-analytics-http-requests","destination_conf":"https://analytics.ahrefs.com/api/cf_logpush/http_requests?header_x-ahrefs-web-analytics-property=YOUR_PROPERTY_KEY","dataset":"http_requests","frequency":"high","filter":"{\"where\":{\"or\":[{\"key\":\"ClientRequestHost\",\"operator\":\"eq\",\"value\":\"yourwebsite.com\"},{\"key\":\"ClientRequestHost\",\"operator\":\"endsWith\",\"value\":\".yourwebsite.com\"}]}}","output_options":{"field_names":["ClientIP","ClientRequestMethod","ClientRequestHost","ClientRequestProtocol","ClientRequestScheme","ClientRequestURI","ClientRequestPath","ClientRequestUserAgent","ClientRequestReferer","EdgeStartTimestamp","EdgeEndTimestamp","EdgeResponseStatus","EdgeResponseBytes","EdgeResponseContentType","EdgeTimeToFirstByteMs","ClientCountry","ClientCity","ClientASN","ClientDeviceType","ClientRegionCode","BotScore","BotScoreSrc","BotTags","VerifiedBotCategory","RayID","RequestHeaders"],"timestamp_format":"unixnano"},"enabled":true}'
Add the custom log fields rule
RULES=$(curl -s --fail-with-body "$BASE/zones/$ZONE_ID/rulesets/phases/http_log_custom_fields/entrypoint" \
  -H "Authorization: Bearer $CF_TOKEN" | jq -c '.result.rules // []')

echo "RULES=$RULES"
BODY=$(jq -nc --argjson rules "$RULES" \
  '{rules: ([$rules[] | select(.description != "ahrefs-web-analytics-web-bot-auth-signature")] + [{"action":"log_custom_field","expression":"true","description":"ahrefs-web-analytics-web-bot-auth-signature","action_parameters":{"request_fields":[{"name":"signature"},{"name":"signature-input"},{"name":"signature-agent"}]}}])}')

curl -s --fail-with-body "$BASE/zones/$ZONE_ID/rulesets/phases/http_log_custom_fields/entrypoint" -X PUT \
  -H "Authorization: Bearer $CF_TOKEN" \
  -H "Content-Type: application/json" \
  --data-binary "$BODY"
info
The BotScore, BotScoreSrc and BotTags fields are only available with a Cloudflare Bot Management subscription. Bot Analytics works without them, though including them improves bot classification. If your zone does not have Bot Management, remove these three fields from field_names before creating the job.
warning
The destination_conf URL and property key are unique to your project. Copy the exact commands from your Project Settings → Bot Analytics page to ensure the correct values.
Step 3 — Verify the connection
After creating the job, go back to Project Settings → Bot Analytics in Ahrefs and click Check status to verify that data is being received.